Adding new screens to your app has never been this fast.
Inside AppForceStudio, you can generate fully designed, interactive screens in seconds – using AI, uploading screenshots, or pasting code. Whether you’re starting from scratch or expanding your existing build, adding screens is just a click away.
Here’s exactly how to do it.
Step 1: Launch or Open Your Playground
Your Playground is the workspace where your app comes to life.
Not sure how to create one?
👉 Read: How to Create a Playground in AppForceStudio
Once you’re inside the Playground, you’re ready to add screens.
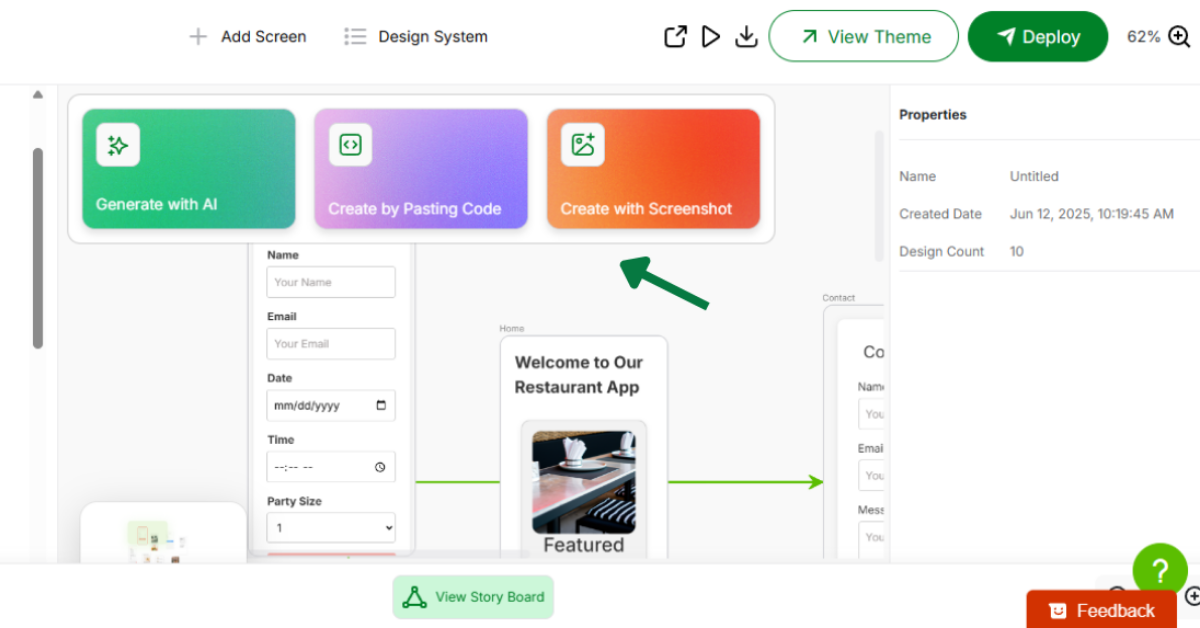
Step 2: Click “Add Screen” from the Playground
At the top of your screen or in the main canvas controls, you’ll see a button labeled “Add Screen.”

Click it – this opens up three screen creation methods:

Option 1: Generate with AI (Prompt)
Type exactly what you want to build.
Example prompt:
“Create a login screen with email and password fields, a sign-up link, and a login button.”
AppForceStudio will generate a fully designed screen based on your prompt — including layout, buttons, inputs, and styling.

Option 2: Upload a Screenshot
Already have a screen designed in Figma or another tool?
- Upload a screenshot of your UI
- AppForceStudio will auto-convert it into a working, editable screen inside your Playground
Perfect for redesigns, UI imports, or onboarding legacy projects.

Option 3: Paste or Write Code
Want to build from code?
- Choose “Create with Code”
- Paste your HTML, Swift, or Kotlin
- Instantly preview and convert it into a live screen in your app
This option is great for developers who want code-level input with visual output.

And You’re Done
Once your screen is added, you can:
- Rearrange it in the app flow
- Add navigation
- Edit it with code or AI
- Preview it across mobile, tablet, and desktop views
App building doesn’t get more flexible than this. Check out AppForceStudio to start building right away!